An Unbiased View of Basics Of Quilting
Wiki Article
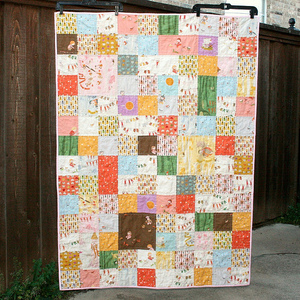
Basics Of Quilting for Beginners
Table of Contents4 Simple Techniques For Basics Of QuiltingHow Basics Of Quilting can Save You Time, Stress, and Money.The Facts About Basics Of Quilting RevealedFacts About Basics Of Quilting UncoveredHow Basics Of Quilting can Save You Time, Stress, and Money.
The second is orange. After this ditch quilting, you can anchor the seam lines in between the boundaries and center of the quilt.These stitches are protected when the binding is sewn to the patchwork. How does your equipment quilting look? Tucks on the back are a sign the patchwork wasn't pin basted effectively.
If this will trouble you, this is the moment to rip out your stitching as well as re-baste your quilt top before there are way too many issues. End Up the Ditch Quilting In the complying with images, quilting lines received black were stitched in previous actions. Once the support quilting is complete, return to the the initial line of quilting.
Sew from the top down inside the borders. Continue in this fashion until there are no more lines to quilt. Patchwork every one of these joints parallel. Link off both ends of the quilting lines when they begin within the body of the quilt. (see right)By beginning in the facility as well as after that relocating to the outdoors right, you'll never have more than half the patchwork under the arm of your machine at once.
Basics Of Quilting Fundamentals Explained
Again, by functioning to the right, at the majority of fifty percent of your patchwork is under the needle at any one time. Next turn the quilt 90 levels, as well as ditch quilt the seam lines, working out from the.For angled sets like Figures 2 & 3, follow this exact same pattern of quilting. Just How to Equipment Patchwork the Border If you've complied with the directions, the seams in between the borders and also center are already stitched.
It is YOUR patchwork. basics of quilting. Exactly how you pick to maker patchwork it is YOUR option. If you quilt the boundary in a continual line, take treatment at the corners.
Some quilters include a line of stitching within a 1/4" of the quilt's side so they can get rid of the security pins at the edge early on. Simply informative post like our rail fence patchwork pattern, for numerous starting patchworks, once this support quilting is done, the patchwork IS quilted.
Fascination About Basics Of Quilting
Just ditch quilting is needed. Full any kind of additional quilting in the complying with order: Any sewing with a walking foot. These are the attractive layouts you include to a patchwork.This short article was published from Generations-Quilt-Patterns. com Print Post Follow Us.
That's Lately Taken This Course Meet various other Creativebug crafters who have lately taken this class.
The optimal knot allows sufficient to ensure that the string won't draw throughout, so typically you need a slightly larger one than a straightforward, solitary knot. The brief video shows how to connect a suitable knot: Hold the needle in your right hand, and also with your left hand, hold near the "tail" of the string (turn around all this for left handers).
Rumored Buzz on Basics Of Quilting
With the left hand, wind websites the thread numerous times around the needle. Slide this coil of thread down the needle until it additionally can be comprehended by the ideal finger and thumb. Holding this coil against the needle with the right-hand man, draw the needle via making use of the left hand.Popping the Knot Unless your textile is quite freely woven, it can be challenging to obtain the knot to pull through the surface material without harming it. This short video demonstrates "standing out the knot": Standing out the knot right into the wadding layer at the beginning of a line of hand quilting.

Just try to settle right into the rhythm and also your stitches will progressively enhance. Goal for even stitches, instead than tiny it will look better. Taking a trip When you get to the end of the first line, you will possibly have lots of string left on your needle, so there is no requirement to fasten off.
Basics Of Quilting - Questions
Simply place the needle via the top textile just, and appear at the next beginning point. Taking a trip to the following beginning point. On the patchwork above, I might have transformed the corner, and continued sewing, but this would have left component of the line unstitched. Strategy your quilting to stitch continual lines wherever possible, with the fastest feasible "journeys".If so, raise the tip of the needle at the half method factor, but just pull up component of the needle. Swivel round the eye end below the textile, and afterwards press on the sharp end of the needle (making use of a thimble!) to ensure that the eye end appears at the preferred setting.
Report this wiki page